In this article, we will show you how to obtain and configure the Office 365 DNS records used to connect your cPanel account or by using the MyCloudDNS service to Office 365. Since the DNS records used for this are account-specific, they must be obtained from your Office 365 account.
To locate your Office 365 DNS records, you must first verify your domain in Office 365. This can be done by following these instructions:
- Log in to your Office 365 account
- Navigate to the Setup > Domains page
- From there, select the domain you want to use, then select Start Setup which will then display the necessary value at the next step
- Go to the Verify Domain page
- Select Add a TXT record instead and press the Next button
- Copy the TXT value shown, which should be like MS=msXXXXXXXXX
- Create the TXT record using this value through the Zone editor in cPanel
- Return to the Office 365 account and verify the domain
DNS Zone Configuration for Office 365 from cPanel
Once you have the necessary DNS settings for your Office 365 account, you can use the Zone Editor in cPanel to add the required DNS entries:
- Modify the MX record using the settings found in the previous section
- Add 3 CNAME records:
a) CNAME record 1 (select CNAME from the + Add Record menu at the top right)
Valid Zone Name: autodiscover
Fully Qualified Domain Name: autodiscover.outlook.com. (period at the end required)
TTL: 3600
Press the Save Record button
b) CNAME record 2 (select CNAME from the + Add Record menu at the top right)
Valid Zone Name: lyncdiscover
Fully Qualified Domain Name: webdir.online.lync.com. (period at the end required)
TTL: 3600
Press the Save Record button
c) CNAME record 3 (select CNAME from the + Add Record menu at the top right)
Valid Zone Name: sip
Fully Qualified Domain Name: sipdir.online.lync.com. (period at the end required)
TTL: 3600
Press the Save Record button - Add a TXT record (select TXT from the + Add Record menu at the top right)
Host: @
TXT Value: v=spf1 include:spf.protection.outlook.com -all
TTL: 3600
Press the Save Record button - Add two SRV records
a) SRV record 1 (select SRV from the + Add Record menu at the top right)
Name: _sip._tls
TTL: 3600
Type: SRV
Priority: 100
Weight: 1
Port: 443
Target: sipdir.online.lync.com. (period at the end required)
b) SRV record 2 (select SRV from the + Add Record menu at the top right)
Name: _tcp._sipfederationtls
TTL: 3600
Type: SRV
Priority: 100
Weight: 1
Port: 5061
Target: sipfed.online.lync.com. (period at the end required)
After adding all the required records, it may take 0-24 hours for the changes to propagate. After this time, you should start receiving email through your Office 365 account.
DNS Zone Configuration for Office 365 from MyCloudDNS
If you use the MyCloudDNS service, the DNS zone configuration is roughly the same as with the Zone Editor in cPanel. Only the type of editor differs.
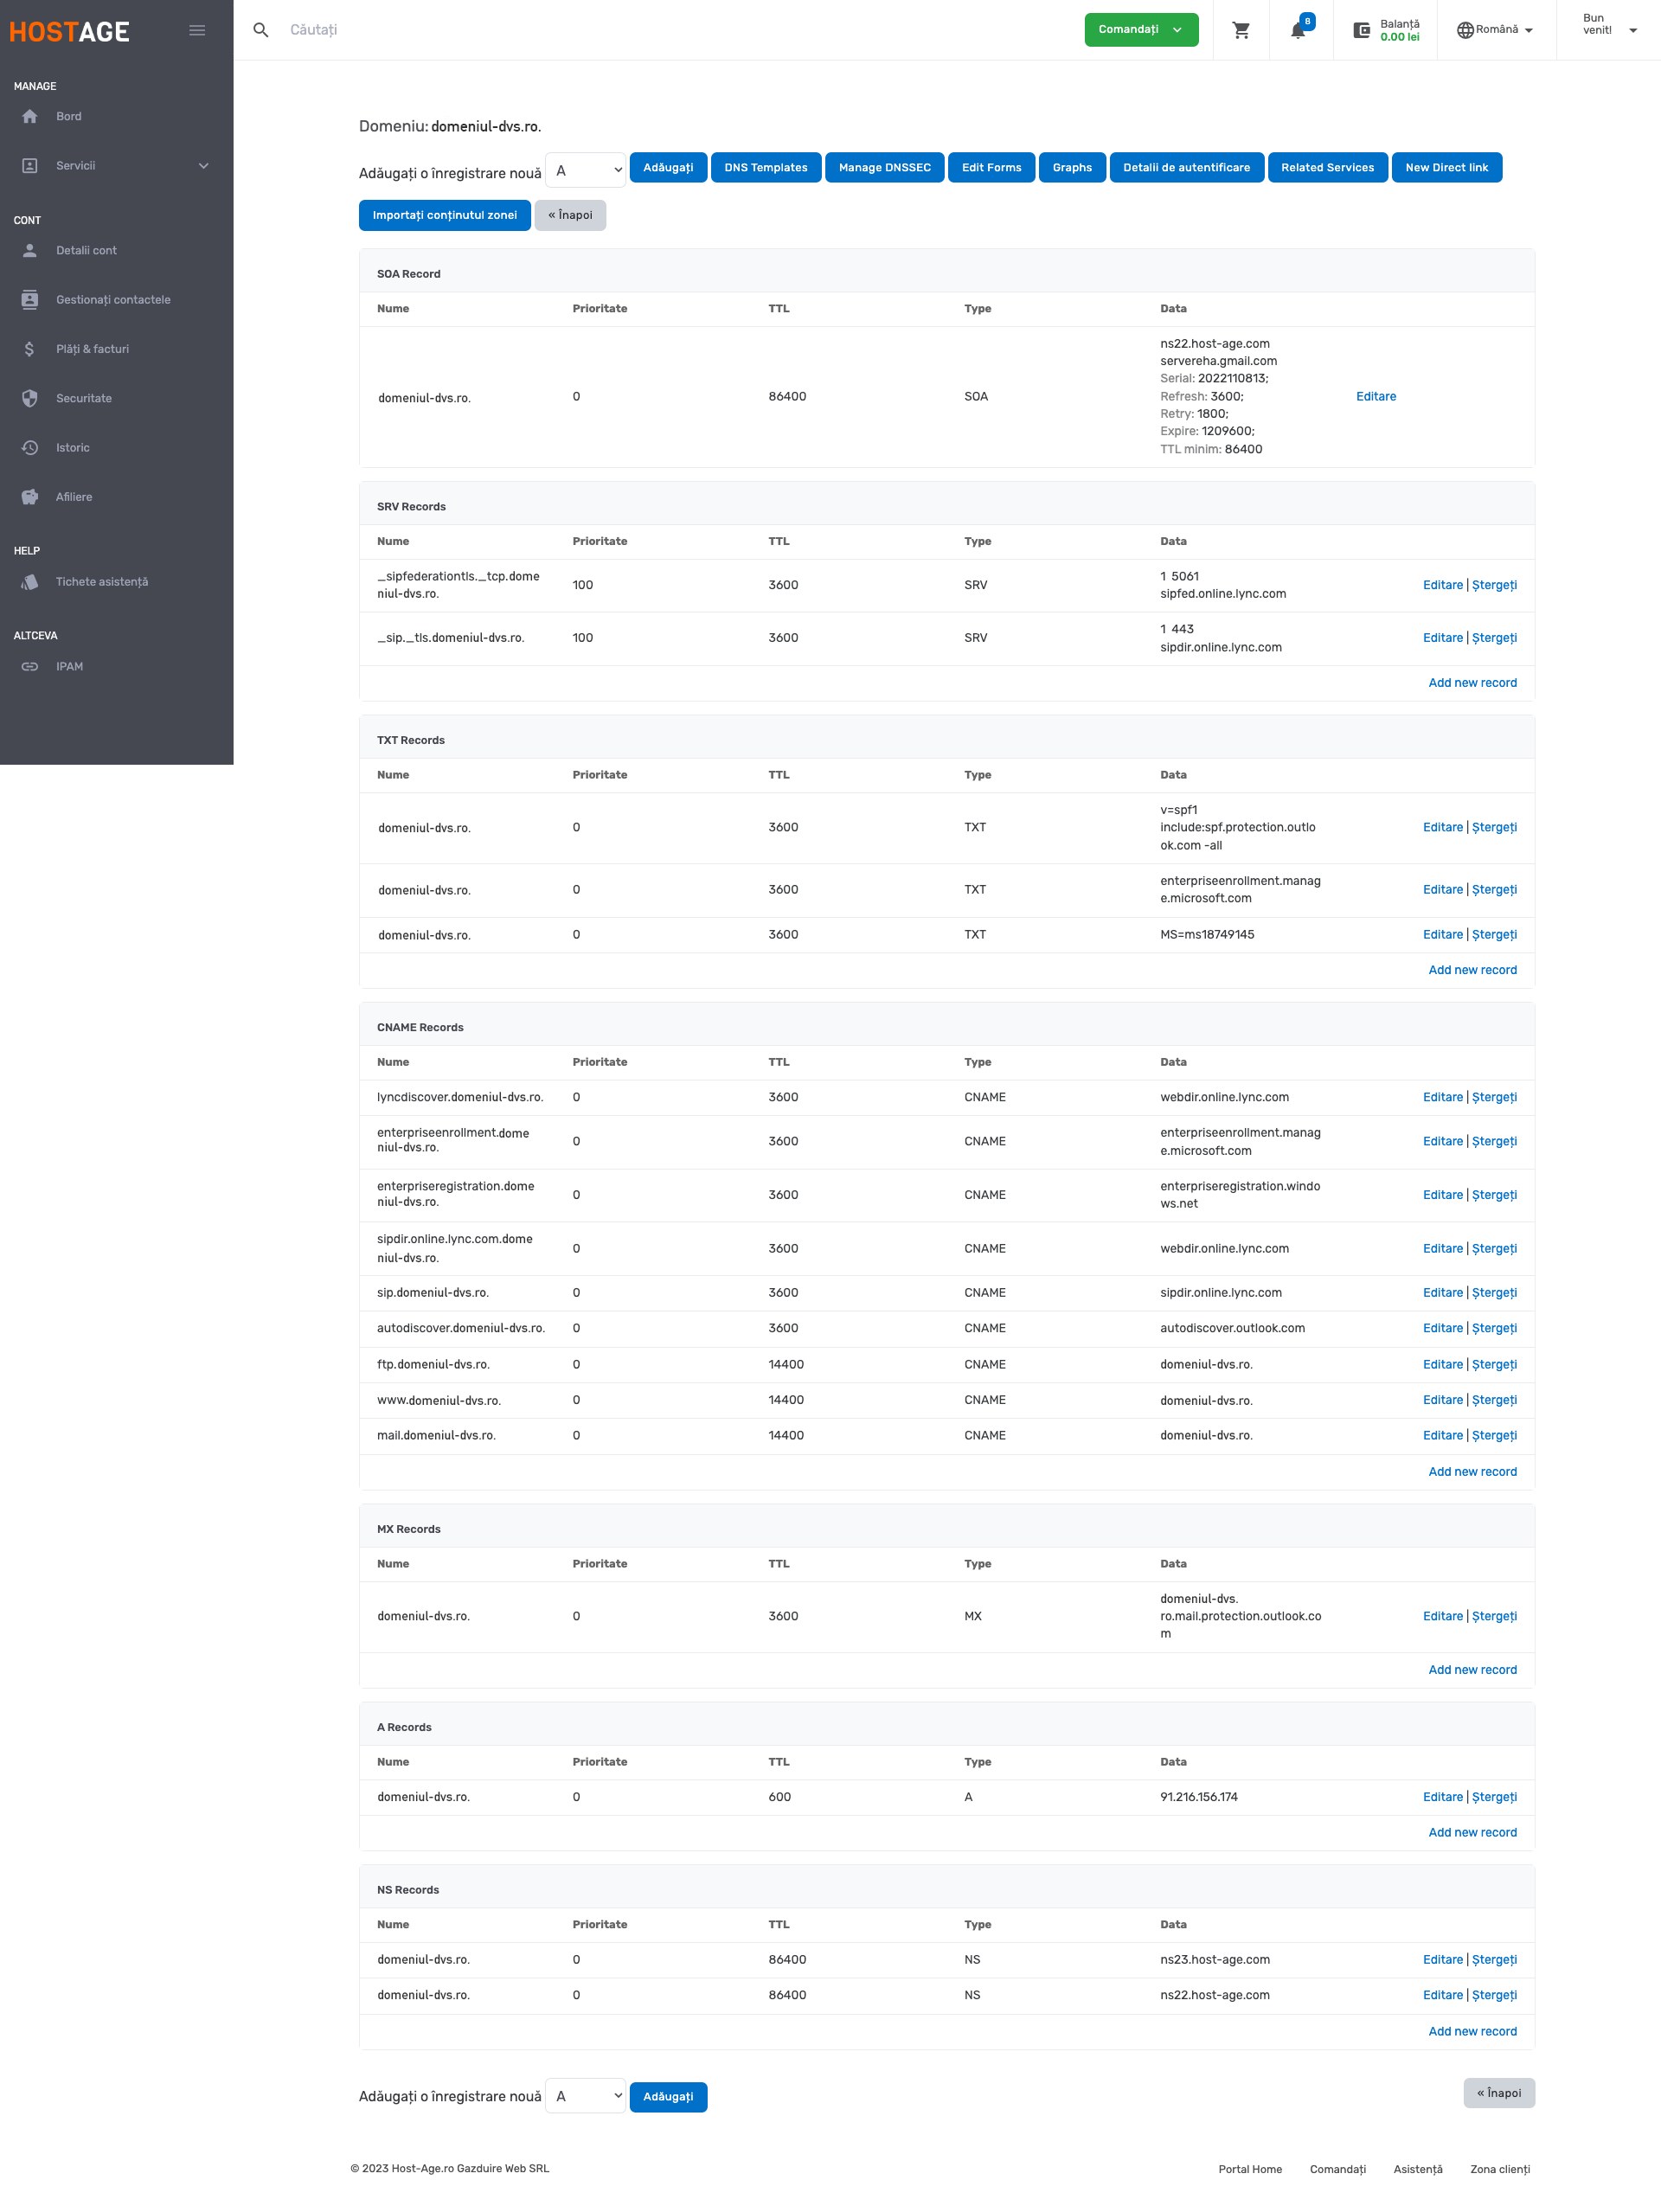
The DNS zone configuration for Office 365 should look like the image below. Click here for the enlarged image.