Congratulations on purchasing a VPS! 🎉
Below you will find the necessary steps to install a Linux operating system, configure the network, and open the required ports from the client interface.
Before starting the installation of your desired Linux distribution, we recommend opening ports 80 and 443. See here how you can open the ports in the Firewall.
1. Accessing the client panel
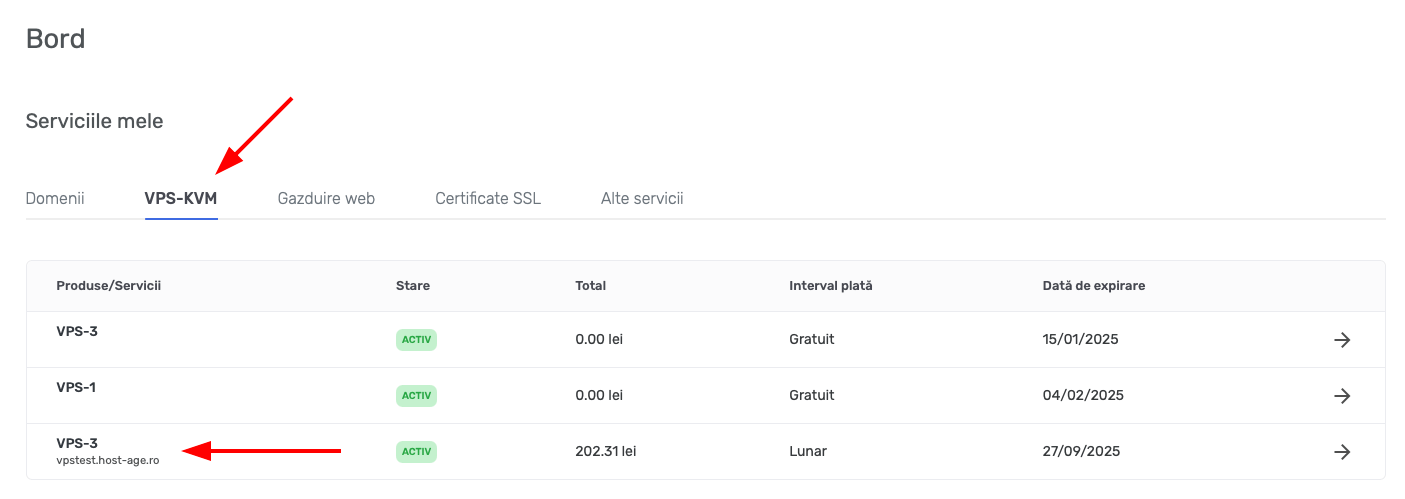
- Go to my.host-age.ro and log in to your Client Account.
- From the main menu, choose My Services then VPS-KVM.
- Select the VPS you ordered.
- You will enter the VPS management interface.
2. Accessing the VPS console
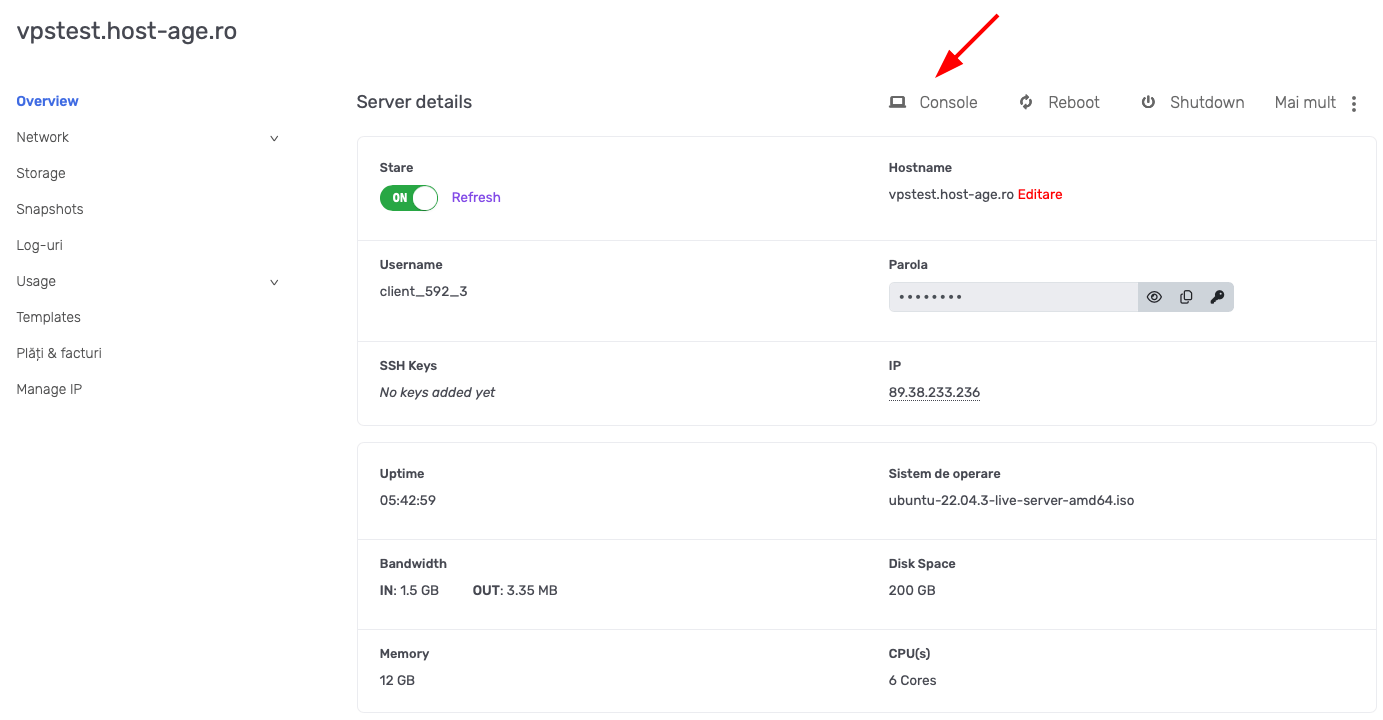
- On your service page, look for the Console button.
This gives you direct access to the virtual server’s screen. - Once the console is open, you can work as if you were in front of a physical server.
- On that page you have all the information related to your new server.
3. Installing and configuring the Linux operating system
- Once the console is started, you can begin installing the desired operating system.
- To configure the network, follow these steps:
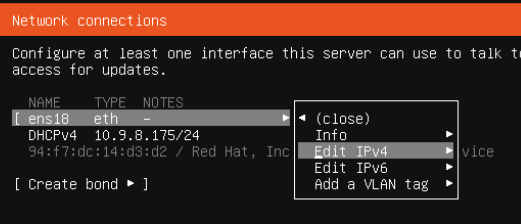
A. During the installation, the network configuration screen will appear, as shown in the image below.
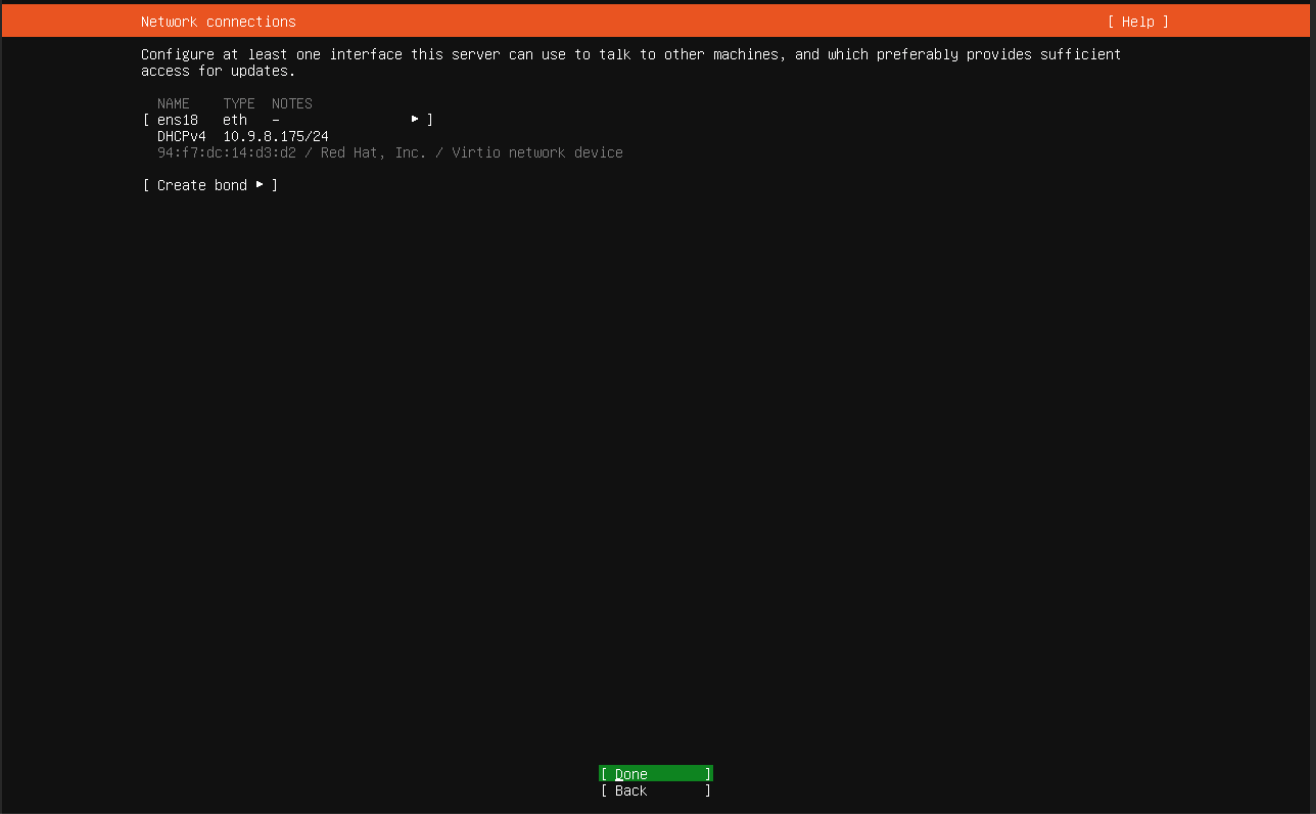
B. Use the Up/Down + Right/Left arrows and press the Space key to select an option
C. Go to ens18 eth and press the Left key, then choose Edit IPv4 and press the Space key.
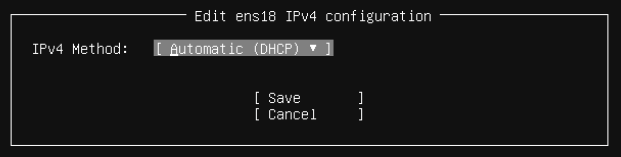
D. At IPv4 Method: select Manual
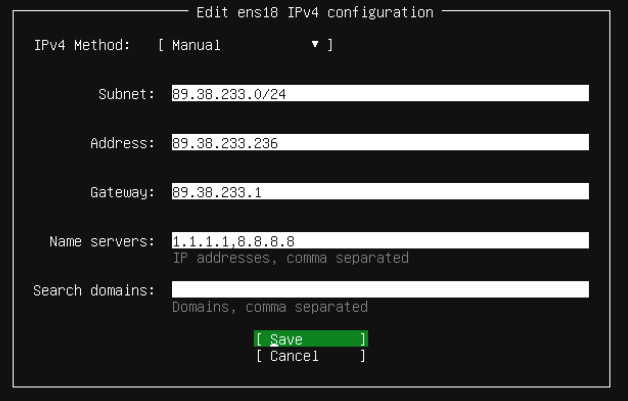
E. Configure the network as shown in the image below, as follows:
Suppose you received the IP 89.38.233.236. For Subnet use 89.38.233.0/24, for Address use the assigned IP, i.e. 89.38.233.236.
For Gateway use 89.38.233.1 and for Name servers use 1.1.1.1,8.8.8.8
Select Save and press Enter
If you received an IP from another class, e.g. 91.216.156.123, configure as follows:
For Subnet use 91.216.156.0/24, for Address use the assigned IP, i.e. 91.216.156.123, and for Gateway use 91.216.156.1
At this point the network is configured, and the system installation and update will begin.
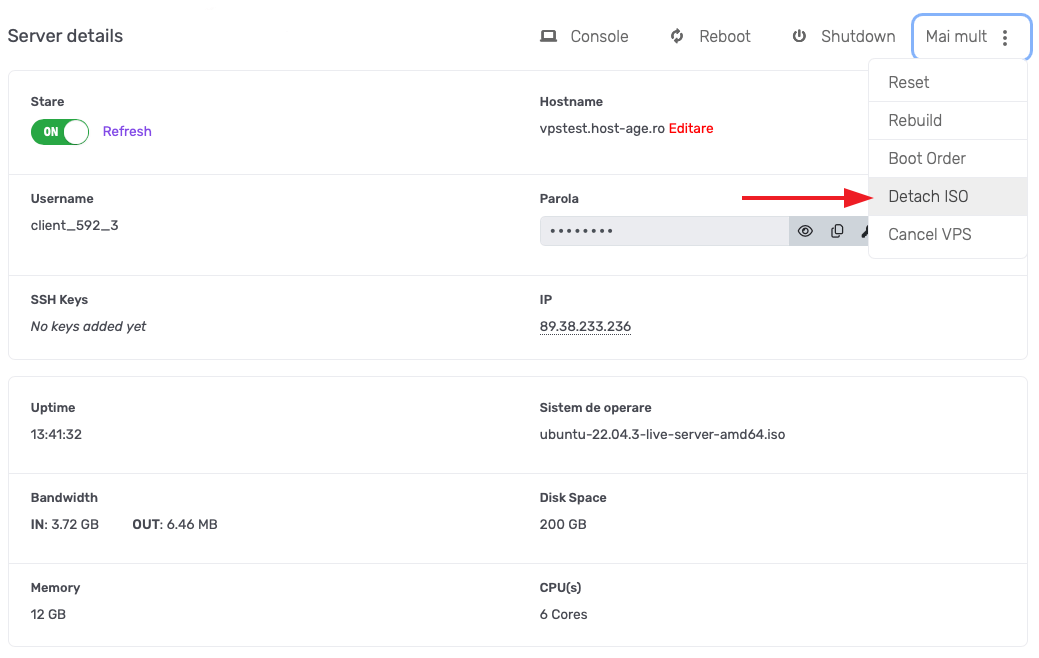
After the system installation is complete, the system must be restarted. Before doing this, you need to “eject the CD” 😁 otherwise, upon reboot, the installation will start again. To detach the CD, go to the VPS page in your client account, click on More and then Detach ISO.