FileZilla Configuration
To upload the website to the server you can use an FTP client. If you don’t have one, you can use FileZilla (which is free and available for Windows, Mac OS X, and Linux) that you can download here https://filezilla-project.org
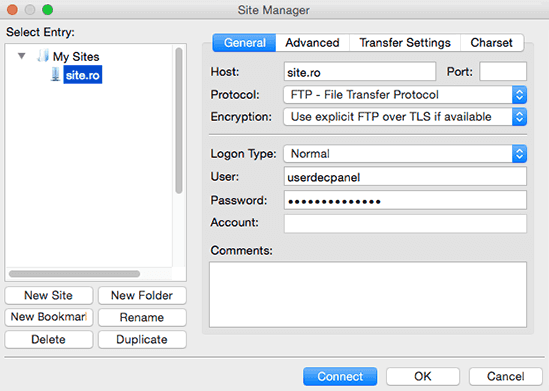
After installing and opening FileZilla, select Site Manager from the menu (shortcut: CTRL+S) and a window like the one in the adjacent image will appear.
At Address/Host: enter the site name, at Protocol: select FTP – File Transfer Protocol, at Encryption select Use Explicit FTP over TLS if available (Note! on some connections this setting may not work, try Only use plain FTP), at User: enter your cPanel username and at Password: your cPanel password (the cPanel username and password were sent by email when the account was activated).
You can now connect to the server by pressing the Connect button.
Attention!
The main page must be named index.html or index.htm or index.php. All the website content must be uploaded into the public_html folder.
Do not delete the public_html folder under any circumstances, even if you recreate it the website will no longer work because this folder has special permissions!
It is necessary to enable “Passive (PASSV) Mode” in the Settings/Preferences of the FTP client.